
This week’s post in the how to series is how I create images for my blog. I’m going with an easy one which is the image I use as my signature on all my blog posts. As an added extra you’ll also learn where you copy and paste the code so that it shows up on every new post you create and publish.
To create the image I use PicMonkey as it’s free and fairly easy to use. What I’ll be giving instructions for is the signature below but you can use PicMonkey to create almost any blog image that you want. It’s a great program to have a play around with and there is nothing you can get wrong (in case that was a worry).
When you open PicMonkey choose the option to Design which is the third one in from the left as you can see in the picture below.

When you click on Design, below it a new menu will open with various options for sizing the image you wish to create. I go for custom (click on it) and pop in the size (in pixels) that I want the image to be. In this I went for 200 x 100 but if you find this is the wrong size you can adjust it from a menu later.

From there you can play around with the menus and options and see what you can create and basically just have a bit of fun with it.

In order to create the signature picture, I chose a transparent background (as above) so that when it’s applied to my blog all you see is the text. I then chose the font I wanted to use and add that to the box with the transparent background. Once this was completed I saved the image and prepared to create the code I would need for it to show up on all posts.
In a new post upload the image you have created as your signature and any social media links (as shown in my previous post) you wish to show up below it with a separator (I use | ) to keep the links well spaced.
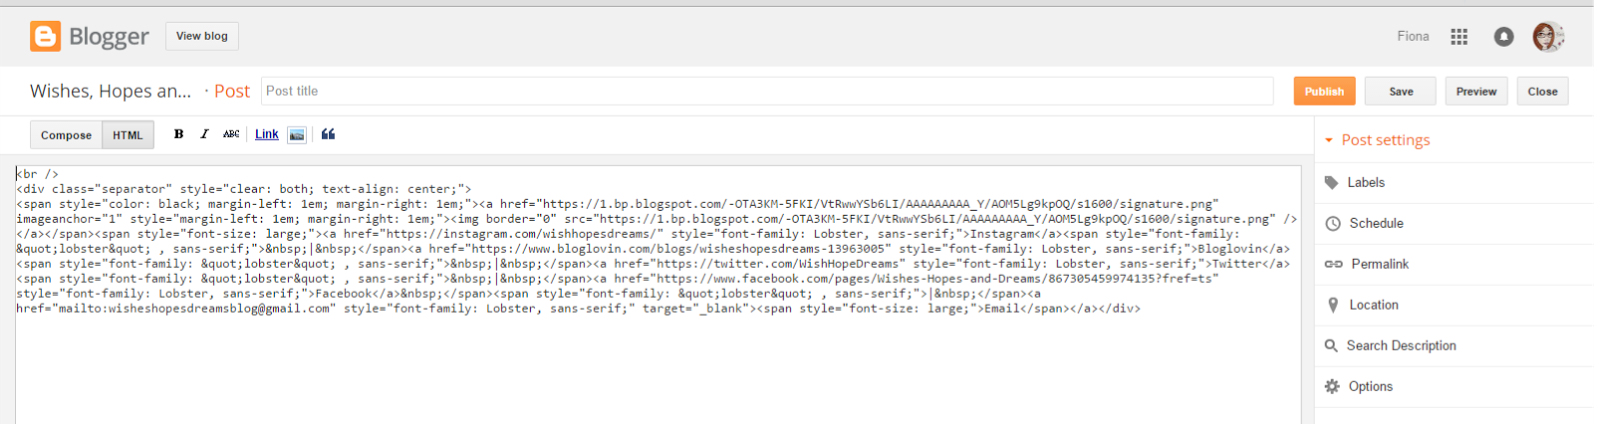
Then on the top left-hand side of the write a post window there is an option which says compose (the view you are in) or HTML. Click on HTML and highlight everything that is on the screen (should look similar to what is below) and then click back to the compose window and close the post. It’s up to you whether you save it or not.
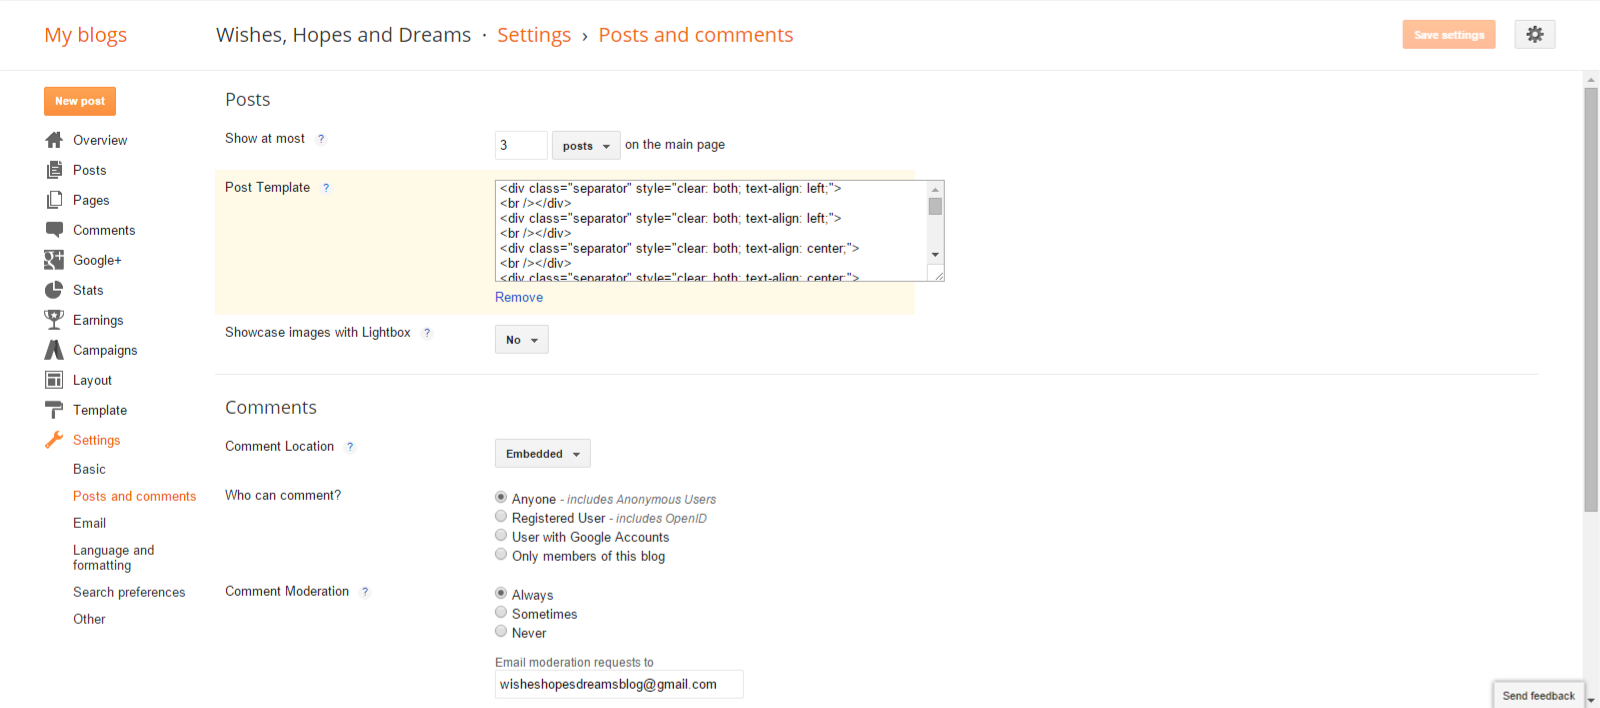
Then open the Settings menu – then open Posts and Comments. In the box which is handily highlighted below copy in the code that you copied from the blog post. Click save at the top of the page (right-hand side) and from then on you’ll have a signature which will appear on every post you publish.
Has this helped you learn how to do something blog related? Is there anything else you would like to learn?
Leave me a comment or find me on Twitter.


